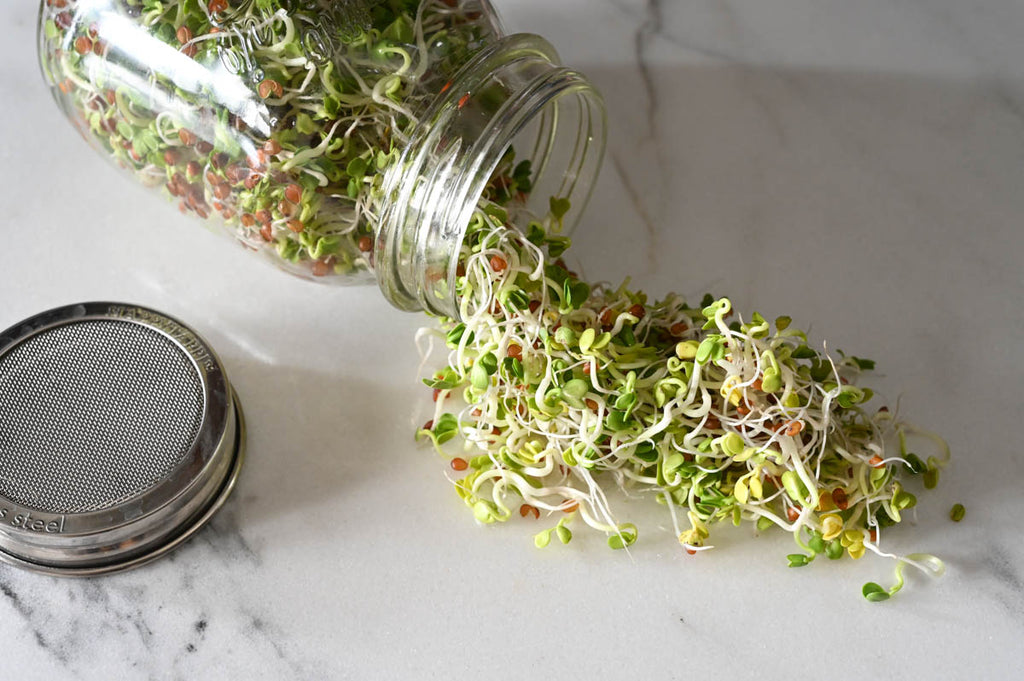
For those of us living in places without California's endless growing season, winter often means a dearth of fresh, raw produce. One way I like to counteract that is by keeping a steady supply of homegrown sprouts on hand that I can add to salads, sandwiches, ochazuke, you name it. Growing sprouts at home is super easy, made even easier with our Stainless Steel Strainer Lid, which turns any standard mouth jar into a sprouter.
Sprouts are generally even healthier than the vegetables they eventually become as each little seed is packed with nutrients and antioxidants. My favorite sprouts are generally in the Brassica family, which includes cruciferous vegetables like kale, cabbage, and broccoli, as well as mustard and radishes. Lately I've been working through a pound of daikon seeds, so that's what's pictured above. They have a great spicy flavor that adds bite to whatever you put it on — I particularly like them on tacos or rice and beans in place of sliced radish. But you can also sprout all kinds of legumes and grains, so try a variety and find what you like. Seeds can be bought directly from companies that specialize in sprouts, but you can also buy them from organic gardening centers. I get my daikon seeds locally in Santa Fe from Plants of the Southwest.
The technique for making sprouts is generally the same no matter what seed you choose. I start with a pint jar, which makes a good amount of sprouts for the two of us to enjoy for a few days. In general, one tablespoon of seeds will make one cup of sprouts. Add two tablespoons of seeds to the jar, screw on the strainer lid, then rinse with cool water and drain. Fill the jar with water and set aside overnight (8-12 hours) to soak. In the morning, pour off the soaking water through the strainer lid, then rinse the seeds and drain again. From now on, you want the seeds to stay moist but not super wet and not clumped together — my technique for this is to shake the seeds so that they stick around the sides of the jar, then invert the jar into a bowl so that any excess water can drain off. Set the bowl in a warm place (around 70 degrees is ideal) out of direct sunlight and leave for 8-12 hours. You'll repeat this process of rinsing and draining every 8-12 hours for the next 3-5 days. Generally twice a day, morning and night, is sufficient, but if your ambient humidity is low and the seeds are drying out faster, you'll want to rinse them three times a day.
After three days, the sprouts should have begun turning green and be large enough to start eating, but you can also let them go another day or two in indirect light to get greener. When ready to harvest, I give them a final rinse and then put them in a large bowl of water and swish them around to detach the seed hulls, which should float to the top and can be skimmed off. It's not entirely necessary to remove the hulls, but they do trap water which can make the sprouts rot faster, and I also find eating a lot of them can cause some mild digestive upset. After dehulling, dry the sprouts thoroughly in a salad spinner or absorbent towel, then store in a sealed container in the fridge. I usually place a folded paper towel under the sprouts to absorb any excess moisture. If properly stored, your sprouts should last in the fridge for at least a week or two.
Sometimes the sprouts can develop what looks like white fuzz on them called cilia, which are just tiny root hairs. This will happen as the roots search for water, and could indicate you need to rinse your sprouts more frequently, but they're entirely harmless. Moldy sprouts will have a finer mesh of white and black spotted fuzz and will also smell rotten, so it should be easy to tell the difference. Thoroughly draining your sprouts should prevent mold from developing, so not to worry.